When installing large format floor tiles, achieving a perfectly flat surface can feel like an uphill battle. One common hurdle that tilers face is tile lippage, where the edges of adjacent tiles do not align evenly. This creates an uneven, unsightly surface that can be both dangerous and frustrating. Fortunately, advances in tile leveling systems have revolutionized the way professionals and DIYers tackle this challenge, ensuring smooth, flawless floors. In this article, we explore how these systems work and why they are essential for large tile installations.
Understanding the Challenge of Lippage in Large Format Tiles
Before jumping into solutions, it’s important to grasp why lippage occurs more often with larger tiles. Due to their size, these tiles are more prone to warping or bowing. Even slight dips or unevenness in the subfloor can magnify these imperfections, leading to noticeable height differences along the edges.
Traditional installation methods rely heavily on the skill of the tiler to manually adjust each tile during placement. However, this can be time-consuming and prone to errors, especially with bigger tiles that are heavier and harder to reposition.
Enter advanced leveling systems. These innovative tools are designed to hold tiles firmly at the proper height during the mortar curing process, eliminating the risk of tiles slipping or sliding out of alignment.
Using these systems improves the installation quality by creating uniform grout gaps and minimizing the need for rework—ultimately saving time and lowering costs.
How Advanced Tile Leveling Systems Work to Prevent Lippage
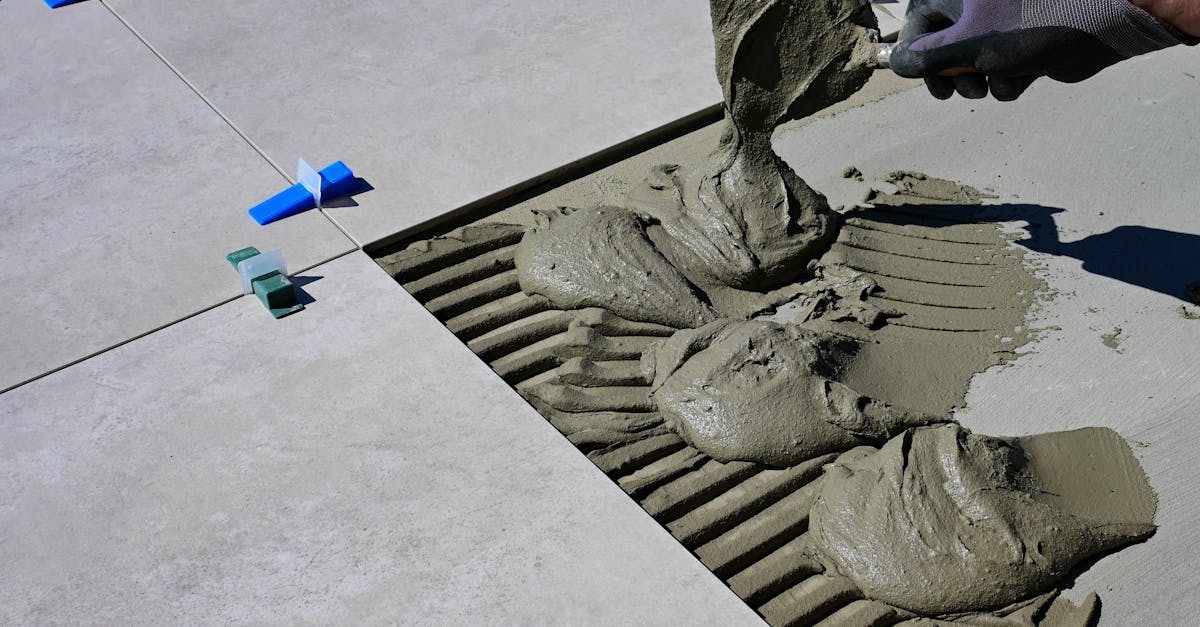
At their core, tile leveling systems feature a combination of clips, wedges, or caps that press tiles into place and hold them steady while the thinset mortar sets. Rather than pushing tiles upward, these systems gently pull high edges down to the level of adjacent tiles, ensuring a flush surface.
Most kits include:
Clips or base plates: Set under the edges of tiles to maintain consistent spacing and provide an anchor point.
Wedges or caps: Inserted into the clips and tightened to apply downward pressure, correcting any unevenness.
Tightening tools: Specialized pliers or mallets to adjust the wedges with precision.
This approach works exceptionally well for large format tiles which often have bowed centers or corners that don’t rest flat. By securing all tile edges simultaneously, the system removes gaps and unevenness.
Moreover, since many components are reusable, these systems are economical and environmentally friendlier over multiple projects.
Choosing the Right Leveling System for Your Project
Selecting the most suitable tile leveling kit depends on several factors including tile thickness, size, budget, and personal experience level. Here’s an overview to help you make an informed decision:
System
Tile Compatibility
Key Features
DGSL Leveling System (600 Clips)
Tiles 1/8″ to 1/2″ thick
Includes pliers, sturdy clips for fast installation
ALBO Tile Leveling Set (1/8 inch, 200 pcs)
Large and small formats
Reusable caps and protection plates to prevent tile damage
LEVELIX PRO 1/8
Large-format tiles
250 spacers with reusable caps and detailed installation ebook
QEP Lash System
Good for DIY, smaller projects
Affordable, simple design, for occasional use
When installing large floor tiles, prioritize systems designed to handle thicker tiles and provide solid, secure locking mechanisms. Professional-grade kits often offer enhanced durability and easier removal features.
Best Practices for Installing Large Format Tiles Without Lippage
Even with the best leveling system, proper preparation and technique matter. Here are practical tips that improve your results:
Prepare the substrate thoroughly. Ensure the subfloor is as flat as possible before beginning. Leveling compounds can help create an ideal base.
Apply thinset evenly and correctly. Using the appropriate trowel notch size helps achieve full coverage under the tiles, preventing hollow spots that cause tiles to shift.
Use leveling clips on all tile edges. Press down with wedges or caps to bring tiles flush. Tighter tolerances reduce visible lippage dramatically.
Remove clips at the right moment. Waiting at least 24 hours for the thinset to cure is crucial. Premature removal risks tiles moving and undoing your hard work.
Handle clips carefully. Strike the base of the clip when removing to avoid leaving plastic fragments in grout lines, keeping the finish clean.
Finally, don’t shy away from investing in quality tools and materials—cutting corners can lead to costly mistakes and less satisfying results.
Ready to elevate your tile installation? Contact a specialized tile leveling system provider today to get expert advice and top-tier products designed for large format tiles. Don’t compromise on quality—ensure your next flooring project is flawless from the ground up.

 Most kits include:


