Choosing the right wall tiles for high-moisture areas is a critical task that can significantly impact the longevity and aesthetics of your spaces. Whether it’s the humid environment of a bathroom or the splashes in a kitchen backsplash, moisture plays a key role in the selection process. Selecting the appropriate materials and understanding how to prepare your walls can prevent a host of issues, including mold growth and structural damage. In this article, we’ll delve into the characteristics of ideal wall tiles, moisture assessment methods, and installation techniques that ensure durability and style.
Understanding Moisture and Its Impact on Tile Adhesion
Moisture presents multiple challenges when selecting wall tiles. Not only can it affect the adhesive’s ability to bond properly, but it can also create a breeding ground for mold and mildew. To illustrate, the following issues arise when moisture is present:
- Adhesive Failure: Tile adhesives work best on dry, stable surfaces. Moisture can hinder this bond, resulting in weak adherence that may lead to tile detachment.
- Mold Growth: Moisture trapped between the tile and wall facilitates mold proliferation, causing health issues and foul odors.
- Substrate Damage: Excessive moisture can lead to deterioration of drywall or backer boards, compromising the structural integrity necessary for a successful tile installation.
- Efflorescence: Salts present in walls can be drawn to the surface by moisture, leaving behind a white powdery residue that can mar the appearance of your tiles.
Assessing Wall Moisture Before Tiling
Before proceeding with any tiling project, it’s essential to ascertain the moisture level of your walls. Several methods can help you accurately assess moisture levels:
- Visual Inspection: Look for dark spots, staining, or peeling paint, which indicate moisture presence.
- Touch Test: Feel the wall surface. A damp or cool sensation can signal moisture issues.
- Moisture Meter: A pin-type or pinless moisture meter provides precise readings of moisture content in various materials.
Reading levels above 12-16% typically indicate a moisture problem that must be resolved prior to tiling.
Preparing Your Walls for Successful Tiling
Preparation is crucial for tile longevity in moist areas. Once you’ve identified and fixed the moisture source—be it a leak or excess humidity—it’s time to dry and seal your walls:
- Drying Time: Allow your walls to dry completely using fans or dehumidifiers, which could take a few days to weeks.
- Sealing: Apply a waterproof sealer to porous surfaces to create an additional moisture barrier once the area is dry.
- Surface Preparation: For very smooth surfaces, light scoring helps increase the bond strength of the tile adhesive.
Selecting the Right Adhesive and Grout
Choosing a suitable tile adhesive is as vital as the tile material itself. For high-moisture areas, a polymer-modified thin-set mortar is often recommended due to its superior water resistance and bonding capabilities. Alternatively, mastic can be useful in low-moisture areas but should be avoided in showers or tub surrounds to prevent re-emulsification.
When it comes to grout, opting for a waterproof or epoxy grout will enhance the durability and longevity of your installation. Proper grout waterproofing helps avoid mold growth in grout lines and extends the lifespan of your tiled surfaces.
Best Tile Choices for High-Moisture Areas
Not all tiles are created equal, especially when it comes to moisture. Here’s a breakdown of popular options:
| Tile Type | Moisture Resistance | Ideal Locations |
|---|---|---|
| Porcelain Tiles | Excellent | Bathrooms, kitchen backsplashes |
| Ceramic Tiles | Good | Vanity walls, kitchens |
| Glass Tiles | Excellent | Shower walls, decorative accents |
| Natural Stone | Variable (requires sealing) | Low-splash areas |
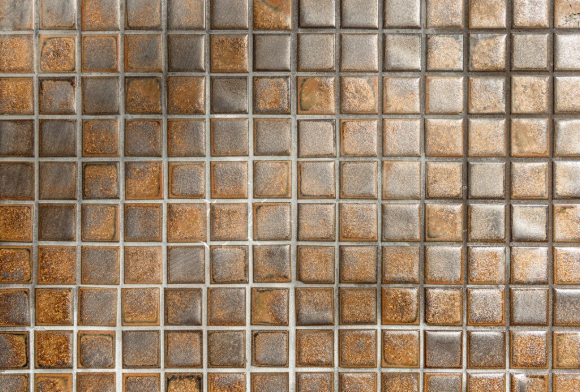
Each of these tiles offers distinct advantages. For instance, porcelain is incredibly dense and nearly impervious to moisture penetration. Meanwhile, glass tiles can reflect light beautifully while providing a seamless surface for easy cleaning.
Maintaining Your High-Moisture Area Tiles
To ensure the longevity of your tile installation, regular maintenance is key. Here are some useful tips:
- Routine Cleaning: Use warm water and mild cleaners to remove stains without damaging the tile.
- Gentle Tools: Employ soft sponges or microfiber towels that won’t scratch the surface.
- Grout Maintenance: Regularly clean and seal grout lines to prevent discoloration.
- Immediate Cleanup: Address spills quickly to minimize staining and prevent moisture buildup.
Investing time and effort into proper tile selection and maintenance yields benefits that last for years. Proper tile materials combined with the right installation techniques can bring beauty and resilience to your walls, making high-moisture areas not only functional but also visually appealing.
For more information on efficient home renovations and tile selections, explore the latest trends at The Tile Gallery.